▷ Best seed starting trays for 2026
For most home gardeners, a quality cell tray with a dome cover provides everything needed for successful seed starting:
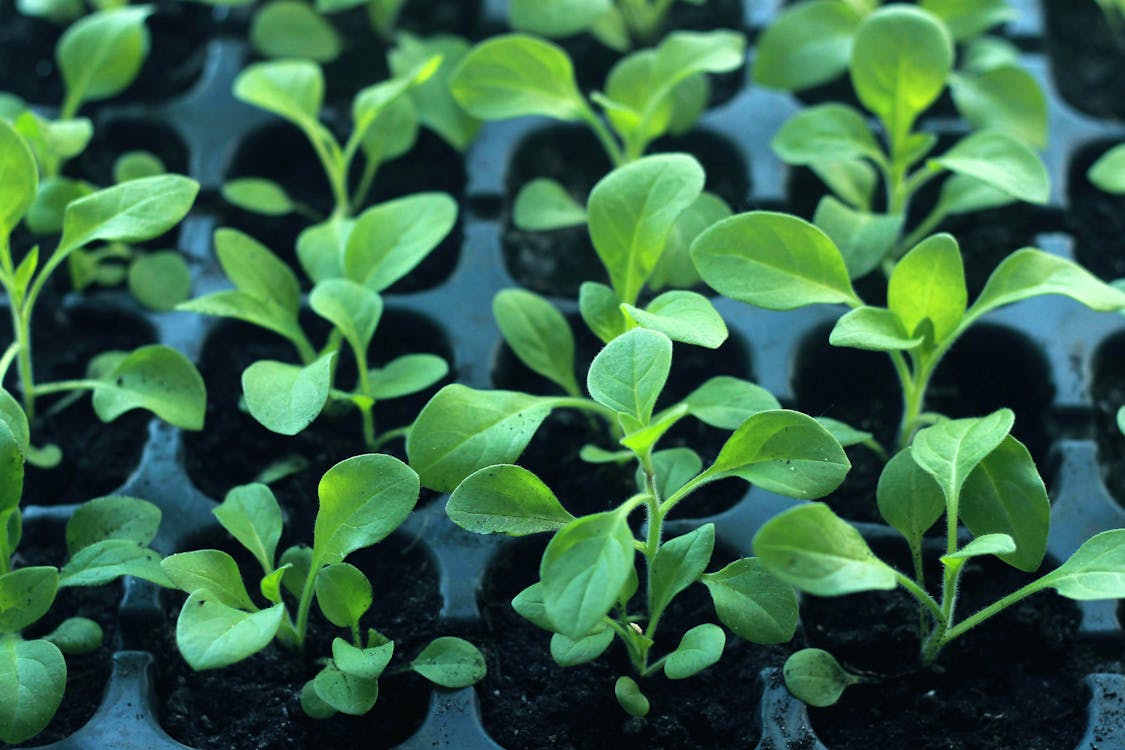
Seed Starting Tray Kit – 72-Cell Trays with Humidity Dome and Base Tray
- ✓ 72-cell seed starting tray kit — includes humidity dome and base tray
- ✓ Reusable thick plastic — bottom-watering design
- ✓ For vegetables, herbs, and flowers — 5-pack
- ✓ Industry-standard 10×20 inch footprint
Price from Amazon.com · ships within US
Seed starting equipment you need
Cell Trays — The Ideal Container
Cell trays (individual cells of 1–2 inches) are the basis of modern seed starting: each seed is sown in its own cell, preventing different plant roots from tangling and making transplanting easy without disturbing the roots. The most used formats are 24, 72, and 128 cells. For tomatoes and peppers (which need more space), use 24–32 cell trays; for lettuce and herbs (transplanted in blocks), 72–128 cell trays are more efficient. Thick plastic cell trays (3–5mm) are reusable for many seasons.
Humidity Domes and Covers
A clear plastic dome is essential for maintaining moisture and warmth during germination: it creates a greenhouse effect that keeps soil temperature and humidity constant. Without a dome, potting mix dries out quickly and seeds fail to germinate. Open the dome a few hours daily once seedlings appear, for ventilation and damping-off prevention. Most seed trays include a dome; if yours doesn't, a clear plastic bag or plastic wrap serves the same purpose.
Seedling Heat Mats — Maximum Control
A seedling heat mat with a thermostat is the most professional seed starting equipment: it keeps the soil at the optimal germination temperature (75–80°F) throughout germination regardless of room temperature. Especially useful for peppers and eggplants (which need 75°F or higher to germinate) and for starting seeds in a cold garage or basement in winter. Power consumption is very low (typically 10–20W) and the improvement in germination rate and speed compared to starting without supplemental heat is dramatic.
Seedling Heat Mat with Digital Thermostat – For Fast Germination
- ✓ Waterproof heat mat with digital thermostat
- ✓ Maintains soil at 68–108°F — adjustable temperature
- ✓ For peppers, tomatoes, eggplants, and tropical plants
- ✓ Fits standard 10×20 inch seed trays
Price from Amazon.com · ships within US
Professional Seed Starting Mix 8 Quarts – Peat, Perlite & Vermiculite Blend
- ✓ 8-quart professional seed starting mix
- ✓ Lightweight peat, perlite and vermiculite blend
- ✓ Sterile and fertilizer-free — prevents damping-off
- ✓ Perfect drainage and aeration for maximum germination
Price from Amazon.com · ships within US
Comparison of seed starting container options
Different seed starting containers suit different needs. Here's how the main options compare:
| Type | Cost | Reusable? | Root Disturbance | Best For |
|---|---|---|---|---|
| Plastic Cell Trays | $3–8 per tray | Yes (20+ years) | Medium — careful removal needed | All vegetables — most versatile |
| Peat Pots | $2–4 per dozen | No — compostable, one-use | None — pot transplants with plant | Vegetables sensitive to root disturbance |
| Soil Blocks | $20–30 maker + soil mix cost | Yes — reusable maker, blocks degradable | Low — air-roots naturally prune | Premium growers, commercial operations |
| Jiffy Pellets | $5–12 per 30-pack | No — one-use compressed peat discs | None — expands then transplants | Small batches, beginner-friendly |
| Recycled Containers | Free (yogurt cups, egg cartons) | Yes (reuse multiple seasons) | High — must cut sides, not remove | Budget-conscious, experimental gardeners |
How to start seeds step by step
The sowing process: fill cells with moist (not saturated) seed starting mix; make a small indent in each cell and place 1–2 seeds; cover with a thin layer of pure vermiculite or fine mix; place the dome and set in a warm location (70–80°F minimum); keep mix moist by watering from below through the base tray. When seedlings emerge (5–14 days depending on species), remove the dome during bright daylight hours so seedlings don't stretch reaching for light. If two seeds germinate in a cell, snip the weaker one with scissors (don't pull — you'll disturb the other).
Seed starting timeline by region (United States)
Timing seed starting correctly is critical — seeds started too early become leggy and desperate for transplanting; too late and you miss the best hardening-off period before final planting. Use your USDA hardiness zone and last frost date as your anchor:
Cold climates (zones 4–5, last frost May 15–31): Tomatoes indoors 6 weeks before last frost (late March–early April); peppers 8 weeks before (late February–early March); lettuces and greens directly sow outdoors 2–3 weeks before last frost (April).
Temperate climates (zones 6–7, last frost April 15–May 1): Tomatoes indoors mid-to-late March; peppers late January–early February; direct sow cool-season crops (lettuce, peas, spinach) 3–4 weeks before last frost (March); warm-season crops (beans, squash, cucumber) directly sow after last frost (mid-to-late May).
Mild climates (zones 8–9, last frost March 1–April 1): Start tomatoes and peppers indoors in January–early February for February–March transplanting; direct sow warm-season crops by April; make second sowings of cool-season crops in late summer (July–August) for fall harvest.
Common seed starting mistakes
Even experienced gardeners make seed starting errors. The most frequent:
Damping-off fungal disease (seedlings collapse at soil level): Caused by overwatering or poor air circulation. Prevent by using sterile seed starting mix (never garden soil), watering only from below, and ventilating the tray by opening the dome 2–4 hours daily once seedlings emerge. If damping-off appears, immediately remove affected seedlings and surrounding mix, don't compost them.
Leggy seedlings (tall, thin, weak stems): Caused by insufficient light reaching the growing point. Seedlings need 14–16 hours of bright light daily (either on a sunny south-facing windowsill or under LED grow lights 2–3 inches above the seedlings). If seedlings are stretching toward the window, they're light-starved — adjust the lights or move them closer to the window.
Over or underwatering: Overwatering creates soggy conditions inviting fungal disease and root rot. Underwater and seeds don't germinate or seedlings wilt. The ideal state is moist but not saturated — like a wrung-out sponge. Check cells daily. Water from below through the base tray; this pulls moisture up against gravity and forces air down into the root zone.
Seedling care after germination
After germination, seedlings need: maximum light (place on the sunniest windowsill or use LED grow lights if natural light is insufficient); slightly cooler temperatures (65–70°F — cooler than germination temperature); regular watering without waterlogging; ventilation to prevent damping-off. When the first true leaves appear (after the cotyledons), begin fertilizing with liquid fertilizer at quarter strength. If seedlings are crowded or roots are filling the cells, pot up to larger cells before final outdoor transplanting.
For more vegetable garden techniques and growing guides, see our complete Vegetable Garden Guide.
What to sow indoors vs. direct sow outdoors
The decision to start seeds indoors or sow directly outdoors depends on the crop's hardiness, growing window, and how long it takes to reach transplantable size. Understanding this distinction is the foundation of successful seed planning.
Always start indoors: Crops with long growing seasons or those that cannot tolerate direct outdoor sowing due to soil conditions. Tomatoes require 60–80 days from seed to transplant-ready seedling, which would consume most of the growing season if started outdoors in cool climates. Peppers and eggplants need 70–90 days and warm soil (70°F minimum) to germinate, making indoor starting essential in zones 6–8. Flowers such as impatiens, begonias, and petunias need 6–8 weeks of growth before they're large enough to compete outdoors.
Direct sow after last frost: Warm-season crops with short seed-to-plant timelines that germinate rapidly in warm soil. Beans, peas, and squash germinate in 7–10 days at 65°F+ and reach productive size in 4–6 weeks, so starting them indoors wastes space. Direct sowing also prevents root disturbance, as their roots are sensitive to transplanting. Corn, cucumber, and melon similarly prefer direct sowing once soil temperatures exceed 60°F. The main advantage is reducing the time the seedling must spend in confined cells, reducing transplant shock and improving final productivity.
Cool-season crops — sow before last frost or in late summer: Lettuce, spinach, peas, and broccoli tolerate cool soil (50–60°F) and can be direct sown 3–4 weeks before the last frost date. These crops actually germinate better in cool conditions than in heat. You can also start them indoors in late July–August for a fall harvest, since they mature in only 6–8 weeks. This extends the season at both ends of the year in temperate climates.
Cabbage, cauliflower, and transplant-friendly crops: These brassicas tolerate transplanting and benefit from indoor starting, as it gives you control over timing and reduces pest pressure during the vulnerable seedling stage. Start indoors 4–6 weeks before planting date. Brassicas need cooler growing temperatures (60–70°F) compared to tomatoes, so they can grow under grow lights or on a cool windowsill without stretching.
In summary: long season crops (tomatoes, peppers, eggplants, flowers) → start indoors. Quick crops with tender roots (beans, squash, corn, melon, cucumber) → direct sow. Cool-season crops (lettuce, brassicas, peas) → can do either, but spring indoor start or summer direct sow for fall crop works best.
Optimizing germination: temperature, moisture, and light
Three environmental factors control seed germination: soil temperature, moisture level, and light. Understanding the requirements for each crop allows you to create the exact conditions needed for high germination rates.
Soil temperature: Every seed has a minimum, optimal, and maximum germination temperature. Tomato seeds germinate at 65°F but germinate fastest at 75–80°F (5–7 days vs. 12–14 days at 65°F). Peppers require at least 70°F, with 75–80°F being optimal; below 70°F germination is sporadic and slow. Lettuce germinates well at 60–70°F but actually germinates better at cooler temperatures (55–65°F) than at heat. Warm-season crops (beans, squash, cucumber, melon) need 65–75°F, while cool-season crops tolerate or prefer lower temperatures. Use a seedling heat mat to maintain consistent temperature, especially if your seed starting location is in an unheated garage, basement, or cold room. Without a heat mat, seedlings in cold environments take twice as long to germinate or fail entirely.
Moisture: Seeds need moist but not waterlogged soil. Saturated soil lacks oxygen, causing rot and fungal disease; dry soil prevents water absorption, and the embryo cannot activate. The ideal state is like a wrung-out sponge: moisture throughout, but no standing water. Water cells from below through the base tray; this pulls moisture up naturally and prevents waterlogging. Check the moisture level daily by lifting the humidity dome and feeling the top of the mix with your finger. If it's dry to the touch, add water to the base tray; if water drains out, the mix is already saturated. Once seedlings emerge, begin airing the dome 2–4 hours daily to reduce humidity and prevent damping-off fungal disease.
Light after germination: Seeds themselves don't require light to germinate (in fact, many seeds germinate best in darkness), but as soon as the first green shoots emerge, they need bright light immediately. Seedlings left in darkness stretch toward any available light source, becoming tall, weak, and leggy. Provide 14–16 hours of light daily using either: a sunny south-facing windowsill (adjust daily as needed to keep seedlings from stretching toward the window), or LED grow lights positioned 2–3 inches above the seedlings. Fluorescent or incandescent lights are inefficient for seedlings; LEDs consume less power and generate less heat. Position lights so seedlings remain compact, not more than 1–2 inches tall, with strong leaf color.
Air circulation: Stagnant air increases damping-off fungal disease and causes weak, spindly growth. After seedlings emerge, open the humidity dome 2–4 hours daily for ventilation. If possible, position a small oscillating fan on low speed to blow gently over the seedling tray (not directly at the seedlings, but nearby to create a breeze). Air circulation strengthens stems and prevents fungal spores from accumulating on leaves.
Practical protocol: Keep seeds warm at 75–80°F in complete darkness under the humidity dome (use a heat mat if necessary). Check moisture daily. As soon as green shoots emerge (visible as tiny loops pushing through the mix), remove the dome and place the tray under bright light for 14–16 hours daily. Reduce temperature slightly to 65–70°F if possible (this strengthens stems). Open the dome for 2–4 hours daily once seedlings have true leaves visible. Water only when the top of the mix begins to dry, from below. This creates vigorous, compact, disease-free seedlings ready for transplanting in 4–6 weeks.
Pricking out: transplanting seedlings to larger containers
Pricking out (also called potting up) is the process of transplanting young seedlings from their seed cells to larger containers once they have developed their first true leaves and roots begin crowding the cell. This critical step allows seedlings to grow larger and stronger before final outdoor planting.
When to prick out: Prick out seedlings when they have developed 2–3 sets of true leaves (the normal-looking leaves that appear after the rounded cotyledons) and roots are visible emerging from the bottom drainage holes of the cell. Timing varies: tomatoes and peppers typically reach this stage 3–4 weeks after germination; lettuce and herbs 2–3 weeks. Don't delay — if roots are severely congested or wrapping tightly in the cell, the plant becomes root-bound and may not recover well even after transplanting. Conversely, if you prick out too early (seedlings still tiny with only cotyledons and a first true leaf), they're fragile and difficult to handle.
Container selection for potting up: Choose a container larger than the seed cell but not excessively large — a 2–3 inch cell or small pot (4 oz to 8 oz plastic cups with drainage holes) is ideal for most vegetables. The new container should allow 1–2 inches of soil surrounding the roots, so the soil can retain enough moisture without waterlogging. If the container is too large, excess soil remains wet, inviting root rot. If it's too small, roots fill it in a week and you'll need to pot up again.
Potting mix for pricked-out seedlings: Use a slightly richer mix than seed starting mix — standard seed starting mix is fine, or add a light fertilizer mix at quarter strength. The seedling now has energy reserves (cotyledons) depleted, so it needs light nutrients to support growth. Never use garden soil or heavy potting mix alone; the mix must remain light and well-aerated. Many growers use a 50/50 blend of seed starting mix and premium potting mix amended with perlite for optimal drainage and rooting.
Technique for pricking out: Fill the new container with moist potting mix, leave a shallow indent, and water in gently. Using a plant label, small spoon, or chopstick, gently lift each seedling from the cell by inserting the tool beneath the roots and lifting carefully so the entire root ball stays intact. Hold the seedling by a leaf (never the stem — the stem is fragile and bruises easily), and place it gently into the new pot so the roots fall naturally into the indent. Firm the soil lightly around the seedling, just enough to stabilize it — don't compress the soil. Water gently from below to settle the soil. If the seedling has a long weak stem (from being leggy), you can plant it deeper, burying part of the stem, and roots will develop along the buried stem, creating a stronger plant.
Aftercare for potted-up seedlings: Place potted seedlings in the same light conditions as before (14–16 hours daily) and maintain temperatures at 65–70°F. Water when the top of the soil begins to dry. Do not fertilize for the first week; after one week, apply a balanced liquid fertilizer (like 10-10-10) at quarter strength every 7–10 days. This provides nitrogen for leaf growth and phosphorus for root development. Seedlings potted up 3–4 weeks before outdoor transplanting will develop strong root systems and will be less likely to suffer transplant shock.
From potted seedlings to outdoor transplanting: Seedlings are ready to transplant outdoors when they have 4–6 sets of true leaves, are 4–6 inches tall, and the root system fills the cell (but is not severely congested). Before transplanting, begin hardening off 7–10 days in advance: place seedlings outdoors in a sheltered, shaded location for 1–2 hours the first day, increasing by 1–2 hours daily. This acclimatizes them to direct sunlight, wind, and outdoor temperature fluctuations, preventing transplant shock and sunscald. By the 7th–10th day, seedlings can stay outdoors in dappled sunlight all day, then move to full sun for the final 2–3 days before planting.