

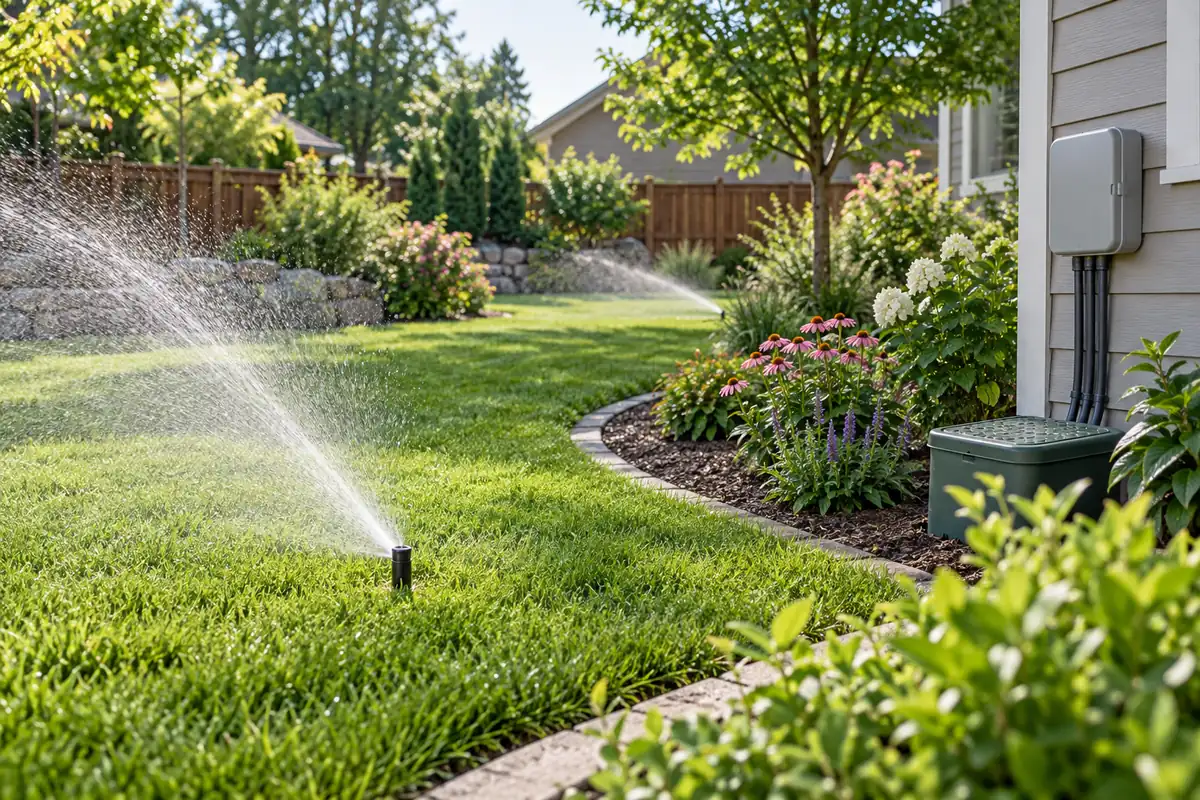
Automatic garden irrigation combines a water source, distribution network and controller. The right setup depends on the plants, zones, water supply, local rules and maintenance access. Lawn rotors, vegetable beds, shrubs and containers may need separate zones. This guide helps you map those needs, compare hose-end timers with valve-based systems, and verify compatibility before buying or installing components.
What is automatic irrigation?
A basic system can automate one hose-connected line; a larger system can use valves to control several zones. Automation sets or adjusts when water is delivered, but it does not confirm that the plants receive the right amount. Check distribution, soil moisture, rainfall and local watering restrictions.
Types of irrigation controllers: mechanical vs smart WiFi
Choose equipment by installation type, number of independently controlled areas, power source and water connection. A hose-end timer serves a faucet-connected line. A multi-zone controller connects to valves in an installed irrigation network. Read the exact model manual for pressure limits, compatible valves, wiring and programming before purchasing.
WiFi smart controllers: weather-based watering
Connected controllers may use schedules, weather data or sensor inputs, but capabilities vary by model and region. Verify which features are included in the exact model, whether a subscription or gateway is needed, and how the controller behaves when the internet or power is unavailable. Do not assume a forecast skip feature replaces a physical rain sensor or a site inspection.
For a replacement, photograph and label existing terminals and zone wires before disconnecting anything. Compare each wire and common connection with the manufacturer’s diagram. If the valve layout or wiring is unclear, ask a qualified irrigation professional.
See our WiFi timer compatibility guide for hose-end versus in-ground equipment and the relevant product manuals.
Rain sensors: verify controller compatibility
A rain sensor can interrupt a compatible controller when its sensing element registers rainfall. Before installation, check the controller’s sensor terminals and the sensor’s wiring diagram, operating limits and mounting instructions. Place it where the manufacturer specifies, test that irrigation pauses, and confirm how it resets after drying.
Model references: GARDENA Rain Sensor 1189-20, Rain Bird RSD-BEx and Hunter Mini-Clik. Check each manual against the controller you own; similar sensor names do not establish compatibility.
Automatic irrigation for balconies and containers
Container systems may use micro-tubing and emitters from a faucet, a reservoir-fed pump or individual self-watering devices. Check the available water source, pot count, outlet access, tubing route and manufacturer capacity. Test every emitter into a measuring cup, inspect for leaks, and then adjust using the plants’ response and the container medium.
For container-specific decisions, compare our irrigation for pots and drip irrigation for pots guides. Keep their scopes distinct: system selection versus emitter setup.
How to set up an automatic irrigation system
- Draw the area and mark water source, valves, beds, containers, sun exposure and slope.
- Group plants by water needs and delivery type; separate lawn spray from drip lines where practical.
- Check source flow and pressure using the selected system’s instructions; do not exceed component ratings.
- Install filters, regulators, valves, wiring and backflow protection only as required by the system instructions and local code.
- Run the system and inspect coverage, leaks, blocked emitters and runoff.
- Adjust the schedule after checking soil moisture and recent rainfall; revisit it as seasons change.
CSU Extension’s home-garden drip guide explains the filtration and pressure components used in drip systems.
Choose components for the system you have
We do not rank irrigation equipment without a documented comparison. Use the relevant guide for the question at hand: controller installation type, rain-sensor selection or drip-system design. Check exact manuals before buying.
Compare systems by the area and delivery method
Compare system types by the delivery network and area they control—not price claims:
- Hose-end timer: schedules one faucet-connected hose or line; check the timer’s connection, pressure and power requirements.
- Valve-based in-ground system: separates areas through valves and a controller; installation depends on the existing piping and local requirements.
- Drip or micro-irrigation: distributes water through tubing and emitters; filter and pressure requirements depend on the design and components.
- Reservoir-fed container system: uses a pump or passive device where a faucet is unavailable; verify capacity and operating instructions for the exact model.
Automatic irrigation buying guide: budget vs features
Before selecting a timer or controller, answer these questions: Is there an outdoor faucet or an existing valve system? How many areas need different schedules? Is electrical power or WiFi available at the mounting location? Which components are already installed? Do local rules require backflow protection or restrict watering times?
Use the manufacturer’s compatibility chart and wiring diagram for the exact model. If the listing does not show these details, contact the manufacturer or choose a model with documentation. Do not choose by an unsupported budget tier.
Measure water use instead of assuming savings
Do not assume a controller will save a fixed number of gallons or pay for itself. Estimate your own use from the water meter or irrigation submeter, record run times and compare similar weather periods. Check whether the system waters the intended root zone without runoff; a timer cannot correct poor layout, leaks or a schedule that does not match the plants.
For weather-based controllers, see the EPA WaterSense label and product criteria. For water-wise planting and zoning, see Colorado State Extension’s design steps. For drip components and maintenance, use the CSU home-garden drip guide.
Map the site before you choose equipment
Start with a simple plan rather than a product list. Draw the property or balcony to scale if possible, then mark the water source, paved surfaces, planted areas, slope, existing valves, trees, walls and locations where a hose or cable must cross a path. Note which plants are established and which are newly planted; a new bed may need a different check routine while roots establish. Mark sunny and shaded areas separately because the surface may dry at different rates.
Record constraints you cannot change: tap location, available power, WiFi reach, drainage, access to the controller and any water-use rules. On a balcony, include the route from the faucet or reservoir to each pot and the place where runoff would go. For an in-ground system, locate existing pipes and cables before digging. If you cannot identify buried services or the existing valve layout, pause and ask the property owner or an irrigation professional before excavation.
The drawing helps you estimate tubing and cable routes, but it is not a substitute for measuring the real site. Use it to make a list of zones and connections, then verify dimensions, pressure and model compatibility from the relevant manuals. A practical plan also leaves room to open a valve box, replace a filter, remove a timer for winter or reach an emitter without stepping through a bed.
Check flow, pressure and water connections
A controller schedules water; it does not make an undersized source deliver more. Before buying heads, emitters or a multi-zone controller, check the water supply and the limits published for each component. Flow and pressure are related but different: a reading at a static tap does not necessarily describe the pressure or flow available while several outlets are operating. Follow the chosen system’s measurement instructions and consult a qualified installer if the supply or plumbing is unfamiliar.
Make a connection inventory. Note whether the system uses an outdoor faucet, a valve manifold, a pump and reservoir, or an existing irrigation line. Check thread type, filter needs, pressure regulation, backflow protection and the maximum operating pressure listed by the component maker. Do not force mismatched threads or assume that a faucet timer can be attached to a buried valve system. Leaks at connections can waste water and can also make the far end of a line appear under-watered.
For drip systems, a filter and pressure regulator may be necessary depending on the layout and the emitter specifications. CSU Extension describes these components in its home-garden drip-irrigation guide. Use the ratings and installation sequence for the selected equipment; do not copy a pressure setting from another garden. If a zone contains more outlets than the supply can serve, divide or redesign it instead of extending run time blindly.
Build zones around plants and delivery methods
A zone is an area controlled together. Grouping makes the system easier to program, but plants on one zone should have compatible water needs and delivery hardware. Turf sprinklers, a hedge dripline and pots on a balcony are usually easier to inspect when they can run independently. Soil type, sun, slope, exposure to wind, root depth and plant establishment can all affect how quickly an area dries. The appropriate grouping depends on the site rather than a universal number of zones.
Separate areas that are likely to need different checks. A shallow container mix can dry sooner than a shaded garden bed; a slope may show runoff before the flat area is wet; a new planting may need closer monitoring than established shrubs. Do not put drip emitters and lawn spray heads on the same schedule just because they are near each other. If existing plumbing limits your options, document the compromise and inspect each area after a cycle.
Label every zone at the controller and on your site plan with a plain description such as “front lawn,” “raised beds” or “north patio pots.” Take photos of the valve box and wire connections before replacement. Clear labels make seasonal changes and troubleshooting easier, especially if another person needs to stop watering or isolate a leak. Keep the original valve and controller manuals with the labels so later changes can be checked against the actual equipment.
Choose sprinklers, drip lines or micro emitters
Choose the water-delivery method by the plants and surface, then select a controller that can operate that system. Sprinklers can cover turf or broad planted areas, while drip lines and emitters place water near selected plants. Neither method is automatically efficient if the layout is poorly matched to the site. Spray that lands on pavement, a clogged emitter, a kinked tube or a head that misses its neighboring coverage can all create dry and wet patches.
For lawn heads, use the product’s published radius and flow data, and follow the manufacturer’s spacing guidance. Observe the system while it runs: look for water leaving the bed, hitting a wall or pooling before it reaches the intended area. Adjusting a nozzle may help only if the head is designed for that adjustment; do not disassemble a pressurized part. If the pattern or pressure is inconsistent, check the filter, supply, nozzle and zone load using the manual.
Drip systems need their own inspection. Check the first and last emitters in a line, look for leaks at fittings and verify that every plant intended to receive water has an outlet. A visible wet spot at the surface does not prove that the entire root zone is evenly moist. For containers, test the output of each emitter into a measuring cup, then check the mix and drainage holes after a cycle. Our guides to drip design for garden beds and micro-drip for containers cover those layouts separately.
Set a starting schedule and adjust it
Begin with the system manufacturer’s setup steps and local watering guidance. There is no universal number of minutes that suits every lawn, vegetable bed, shrub or pot. Run a zone, inspect the soil where roots are growing and look for runoff or standing water. If the surface becomes wet while the root area remains dry, the layout or delivery rate may need attention; increasing run time without diagnosing the cause can waste water.
Record the date, weather, zone, run time and what you observed. Repeat the check under comparable conditions. Adjust one setting at a time so you can see which change helped. Weather-based controllers can use local data or a sensor to modify a schedule, but the actual features vary by model and region. Read how the model handles rain, temperature, seasonal adjustment, network interruption and manual operation. Keep a copy of the original schedule before changing it.
Revisit the schedule as plants establish, weather changes or the layout changes. Newly planted shrubs may need closer attention early on, while mature plants may use a different root area. Pots may need more frequent checks during hot, windy weather, but the response depends on container size, material, plant and exposure. Use local horticultural advice for crop-specific decisions. Do not set a calendar and assume it will remain correct all year.
Commission and inspect the installed system
Commissioning means checking the full system after installation or replacement. First confirm that the controller clock, date, zone names and programmed schedule are correct. Run each zone manually from the controller and walk the whole area. Look for leaks, loose fittings, damaged tubing, blocked emitters, rotating heads aimed at paths and places where water pools or escapes. Check the far end as well as the first outlet; pressure and distribution can differ along a line.
Test sensors or smart functions using the exact manufacturer procedure. If a rain sensor is installed, simulate or activate its test method and confirm the controller interrupts watering as documented. If a connected controller uses weather skips, confirm its location, units, time zone and network state. Do not assume that an app display proves the valve opened or that a sensor input is wired correctly. Confirm operation at the equipment and in the planted area.
After the first cycle, inspect the soil near roots and check drainage. For beds, examine more than one point in the zone; for pots, inspect individual containers. Correct leaks or poor coverage before relying on an unattended schedule. Note the date and any changes on the site plan. If wiring, mains power, backflow devices or buried plumbing fall outside your experience, use a qualified professional and follow local requirements rather than experimenting.
Maintain and update the system by season
Inspect the system at the beginning of the watering season and after major changes. Clear debris from filters and outlets according to the manual, check batteries where used, review cable and hose condition and open each zone long enough to observe it. Replace damaged parts with components that match the system specifications. Keep spare parts only when their model and dimensions are documented; similar-looking connectors may not seal or regulate pressure in the same way.
Before freezing weather, follow the manufacturer’s instructions for draining, insulating or winterizing exposed components. A hose-end timer, above-ground filter, pump and buried valve system may need different treatment. Do not use compressed air or open a pressurized system unless the equipment instructions and your skills support the method; improper winterization can damage pipes or create a safety hazard. Store removable controllers and batteries as directed by their manufacturers.
In spring, reconnect components, inspect seals and confirm the clock and seasonal settings before automatic operation resumes. After pruning, adding a raised bed or moving pots, check that emitters and spray patterns still serve the intended plants. Update the map and labels whenever a valve or zone changes. A short written log helps separate a seasonal adjustment from a persistent leak, clogged filter or incorrect connection.
Troubleshoot uneven watering and controller faults
When an area looks dry, diagnose before adding more run time. Check whether the controller is in the correct mode, the intended zone is enabled and the date, clock and watering restrictions are right. Then observe the zone while it runs. A clogged filter, closed valve, kinked tube, damaged wire or blocked nozzle can stop delivery. If every outlet is weak, inspect the source and zone load; if only one is weak, inspect that branch or emitter.
When a zone stays wet, look for a leaking valve, a split line, a stuck controller output or a schedule that runs too often for the soil and weather. A rain sensor may be bypassed, connected to the wrong terminals or incompatible with the controller input. Use the exact controller and sensor manuals, and check the wiring before replacing equipment. If water continues after the controller is switched off, isolate the water supply if safe and seek professional help for a valve or plumbing fault.
For a smart controller that is offline, use its local/manual controls and manufacturer support steps. Verify power, the home network and app account without assuming that reconnecting WiFi will fix a valve or sensor problem. Keep a manual way to stop watering and know which valve isolates the system. If the controller is cloud-dependent, check how the model behaves without internet access before relying on remote features.
Plan safe access, electrical work and backflow protection
Keep the controller, valves and filter reachable without climbing over beds or moving heavy pots. Route tubing so it does not create a trip hazard, block a drain or cross a public path without protection. Protect cables and pipes from tools, vehicles and sharp edges. Mark buried lines before garden work, and close or isolate the water before disconnecting a pressurized fitting.
Backflow protection, electrical installation and plumbing rules depend on the local water provider and jurisdiction. Check current local requirements before connecting a system to potable water. Do not remove or bypass a required device to improve flow. For mains-powered controllers or unfamiliar wiring, use a licensed professional. Manufacturer instructions govern the device, while local codes govern the installation; satisfying one does not automatically satisfy the other.
Leave a concise handover note with the zone map, controller model, sensor model, shutoff location, seasonal procedure and current schedule. This is especially useful when a household member or gardener needs to operate the system. A readable plan supports safer maintenance and helps avoid opening a valve or changing a setting without knowing which plants it serves.
Weather-based, soil-moisture and rain-sensor controls
“Smart irrigation controller” can describe different control methods. A clock-based timer follows programmed start times and durations. A weather-based controller uses weather information and site settings to adjust a schedule. A soil-moisture-based controller uses a sensor reading to allow or interrupt a scheduled cycle. A rain sensor detects precipitation and can pause a compatible controller. Some systems combine methods, but the label alone does not tell you which inputs a particular model supports.
Choose a control method after identifying the problem you want to solve. If someone regularly forgets seasonal changes, a controller with documented weather adjustment may help, provided its location and landscape settings are correct. If one representative area needs direct moisture monitoring, check whether the controller accepts a soil sensor and how the manufacturer says to place and calibrate it. If rainfall should interrupt a fixed schedule, confirm the controller has compatible sensor terminals or a supported wireless input. A feature in an app is not proof that a separate sensor can be connected.
For each candidate, verify the model number, supported sensor type, wiring or pairing method, power requirements, operating mode during a network outage, and whether local manual control remains available. Also check whether the controller can support the number of zones and schedules you mapped. WaterSense explains the difference between weather-based and soil-moisture-based controllers in its watering guidance and provides performance criteria for soil-moisture-based controllers. Those U.S. certification criteria are useful for understanding the technology; local water rules still apply where you live.
Audit sprinkler coverage before changing run times
If lawn areas alternate between dry patches and runoff, inspect distribution before extending the schedule. Run one zone and walk its full route. Look for heads that do not rise or rotate, clogged nozzles, water hitting paving, misting, low heads blocked by grass, and gaps between neighboring spray patterns. Check whether the system’s pattern reaches the adjacent head as intended. A timer cannot compensate for a broken head or poor coverage.
A simple catch-container check can show whether a sprinkler zone applies water evenly. Place identical, straight-sided containers at several points within one zone, away from direct splash from a nearby head if possible. Run that zone for a recorded interval, then measure the collected depth in each container with the same ruler. Record the range and the location of unusually low or high readings. Repeat for each lawn zone; do not combine results from zones that use different heads or operate separately. This is a screening check, not a calibrated professional audit.
Use the results to locate the cause: a low reading near one head may point to a clogged nozzle or spacing problem; weak readings across a zone may suggest a supply, pressure or valve issue. Compare the pattern with the head manufacturer’s specifications and inspect again after any adjustment. The University of Minnesota Extension’s home lawn irrigation audit describes a more detailed catch-can method and calculations. Exact spacing and test duration depend on sprinkler type and the audit method, so follow that guide rather than treating one sample layout as universal.
Use cycle-and-soak where water runs off
Water that flows down a slope or pools on the surface may be arriving faster than the soil can absorb it. Clay-rich soil, compacted ground, steep areas and some sprinkler layouts can make this more noticeable. Instead of running one long cycle, divide the total planned time into shorter cycles with breaks between them. The pause lets water soak in before the next cycle. This approach is often called cycle-and-soak; it changes how the water is delivered, not the total amount automatically needed by the plants.
Observe the site during a test run. If runoff begins, stop the zone and note how long it operated before water moved beyond the planted area. Let the surface absorb water, then resume and repeat the observation. Use those observations to set an initial cycle length, while checking soil moisture at root depth and any local watering restrictions. Do not copy a fixed number of minutes from a different garden: soil, slope, nozzle output and plant roots differ.
Separate this adjustment from changes to coverage. If a head sprays onto paving or one corner remains dry, repair the distribution problem first. Cycle-and-soak is not a cure for leaks, excessive pressure or mismatched heads. EPA’s landscape maintenance guidance recommends shorter cycles with breaks for slopes and clay soils where pooling occurs. Colorado State Extension also explains cycling in its home irrigation operation and maintenance guide; conditions in your own soil and local restrictions should shape the schedule.
Keep a watering log to guide adjustments
A short log makes schedule changes easier to evaluate. For each zone, record the date, start time, duration, recent rain, controller mode and what you saw while it ran. Note whether the root area was dry, suitably moist or saturated, and mark any runoff, leaks, blocked emitters or unusual meter movement. For containers, list the pots that share a line and check the driest and wettest examples after a cycle. This helps reveal whether a common schedule suits the whole group.
Change one variable at a time and observe the next comparable cycle. If you alter a schedule, sensor threshold and nozzle together, it becomes harder to tell which change mattered. Include the weather and season because a result after a cool rainy week may not predict performance in hot, windy conditions. Recheck after plants mature, containers move, a lawn is reseeded or a new bed is added; the system may need a new zone or different emitters.
Where a water meter serves the irrigation supply alone, note its reading before and after a known cycle to estimate that cycle’s volume. If the household shares one meter, isolate other water uses as far as practical or use an irrigation submeter; ordinary household readings include showers, appliances and other taps. Compare similar periods and weather, and account for rainfall and any change in planted area. This does not establish a universal saving or payback, but it can show whether your own system’s use changed after a documented adjustment.
Frequently asked questions
Build the system around separate water needs. Map each valve or zone, group plants with similar demand, verify that the source can supply the selected heads or emitters, and add a rain sensor only after checking controller compatibility. Automatic control can apply water on a schedule, but it does not replace checking soil moisture, leaks and coverage. CSU’s water-wise design guide warns against watering an entire yard uniformly, and its drip-system guide covers filtration and pressure.