▷ How to tell when your chainsaw needs sharpening
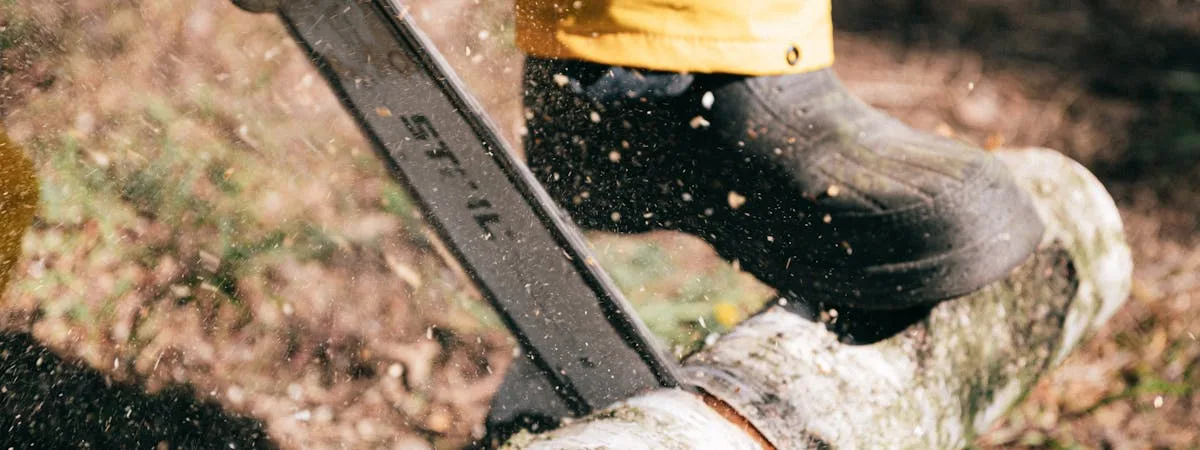
The most reliable sign that your chain needs sharpening is the type of waste it produces. A sharp chain cuts aggressively and throws out coarse, chunky wood chips. A dull chain scrapes rather than slices, producing fine sawdust or powder. Other signs include: you have to apply downward pressure to keep the saw cutting; the cut drifts to one side (a sign that the cutters are uneven); smoke appears during cutting even with adequate chain oil; and the chain bounces or vibrates on the wood rather than cutting cleanly. Any of these signs means it is time to file.
Tools you need to sharpen a chainsaw
For hand filing — the most practical method for field maintenance — you need: a round file of the correct diameter (check the chain manufacturer's specification, most standard domestic chains use 3/16" or 7/32"), a file guide that sets the correct depth and angle automatically, a depth gauge tool to check raker height, and a flat file for lowering the depth gauges when needed. A vice or bar clamp to secure the chainsaw makes the job much more controlled. Work gloves are essential — chainsaw teeth are remarkably effective at cutting fingers.
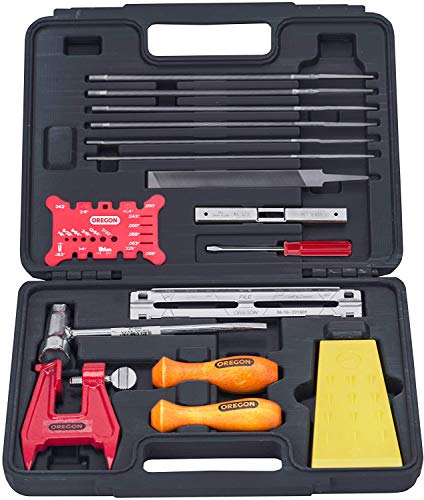
Oregon Chainsaw Chain Sharpening Kit with Hard Case (16-piece)
- ✓ 16-piece complete kit in hard carry case
- ✓ Includes round files (5/32", 3/16", 7/32"), flat file and file guide
- ✓ Depth gauge tool, stump vise and felling wedge included
- ✓ File handles and chainsaw wrench included
- ✓ Suitable for all standard chainsaw chains
- ✓ Works with STIHL, Husqvarna, Oregon and all major brands
Price from Amazon.com · ships within US
Safety equipment you should never skip
Sharpening a chainsaw is technically "off" work with the engine off, but the chain still contains razor-sharp teeth and can cause serious cuts if your hand slips. Always wear cut-resistant work gloves — leather or nitrile with Kevlar knuckle protection is ideal. Eye protection (safety glasses) prevents metal filings from entering your eyes. A dust mask becomes important when using electric sharpeners that generate fine metal powder. The workbench or vice should be stable and at comfortable working height — slouching over a low bench causes fatigue and reduces precision. Ensure good lighting so you can see the cutting edges clearly and monitor the file angle. Never sharpen a chainsaw with the engine running, even if the chain brake is engaged — file fragments near a spinning chain are dangerous. Many professional arborists have suffered serious injuries from file bits ejected at speed.
How to sharpen a chainsaw chain step by step
Step 1: secure the chainsaw safely
Engage the chain brake before touching the chain. If you have a vice, clamp the bar securely — the chainsaw should not move while you file. Put on your work gloves: you will be pushing a file toward teeth designed to cut through wood. If you do not have a vice, brace the saw against a solid surface such as a log or heavy workbench. Good lighting is important — you need to see the cutting edge and the angle clearly.
Step 2: identify the shortest cutter
Before starting, look along the top plates of the cutters. If the chain has hit a stone or metal, one or two cutters may be significantly shorter than the rest. When this happens, you must file all cutters down to match the shortest one — a chain with uneven cutter lengths will vibrate, cut unevenly and cause more rapid bar wear. Mark the shortest cutter with a permanent marker so you know when you have reached it on subsequent sharpenings.
Step 3: file the cutters at the correct angle
Place the round file in the file guide and position the guide on the cutter at 30° to the bar (or the angle specified in your chain manual — some manufacturers use 25° or 35°). The file should sit approximately 20% above the top plate of the cutter. Push the file forward in one smooth, even stroke. Lift it on the return — do not drag it back across the cutting edge. Maintain consistent pressure throughout the stroke. Apply the same number of strokes to every cutter: three to five strokes is typical for maintenance sharpening. Sharpen all the cutters on one side, then rotate the saw or change position to sharpen the other side at the mirror angle.
Step 4: check and lower the depth gauges
The depth gauges (rakers) are the rounded bumps that sit in front of each cutter and control how deeply the cutter bites into the wood. As you file the cutters down, the rakers become proportionally higher relative to the cutter, reducing the cut depth and making the chain cut sluggishly. Every two to three sharpenings, place the depth gauge tool flat across the cutter. Any raker that protrudes above the tool needs filing down with a flat file until it is flush with the top of the tool. Round off the front of the raker slightly after filing to reduce kickback tendency.
Step 5: test the sharpness
After sharpening, re-tension the chain to the correct tension (you should be able to pull it away from the bar by about 3–4 mm at the mid-point, with it snapping back when released). Start the saw and make a test cut across the grain in softwood. A properly sharpened chain will self-feed through the wood with your hands guiding rather than pushing, and will throw coarse chips of 10–15 mm. If it still feels sluggish or is producing dust, go back and repeat the filing with a few extra strokes.
Electric chainsaw sharpener: is it worth it?
Electric chainsaw sharpeners use a rotating grinding wheel to re-profile the cutters quickly and consistently. They are significantly faster than hand filing (2–3 minutes vs 10–15 for hand filing) and eliminate the skill element of maintaining the correct angle. The downsides are cost (quality models from £30–80), the need for a power source, and the fact that they remove more metal per session than a file, meaning the chain wears out faster. For professional users or anyone sharpening multiple chains regularly, an electric sharpener is a worthwhile investment. For the occasional home user who sharpens a single chain a few times per season, a round file kit is entirely sufficient.
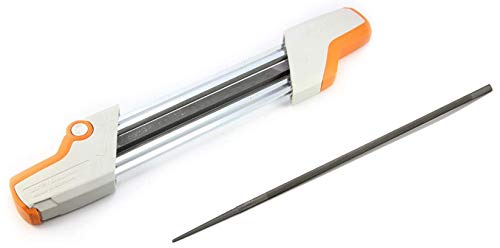
STIHL 2-in-1 Easy File Chainsaw Chain Sharpener 3/8 P
- ✓ Sharpens cutter and corrects depth gauge in one pass
- ✓ No experience or special skills needed
- ✓ Compatible with 3/8" P and Picco chains
- ✓ Includes bonus replacement file
- ✓ Lightweight and compact for field use
- ✓ Official STIHL accessory
Price from Amazon.com · ships within US
Common sharpening mistakes and how to avoid them
The most common mistake is inconsistent filing angle — leaning the file too far down on one side produces a cutter that pulls to that side. Use a file guide every time, not just when learning. The second most common error is filing at the wrong depth — the file should rest 20% above the top plate, not flush or below it. Below flush means you are only filing the side plate, not the cutting top edge. A third mistake is sharpening the right-side cutters at the left-side angle and vice versa: each side requires the mirror angle, and mixing them up creates a chain that cuts in a curve. Finally, forgetting the depth gauges is extremely common — a well-filed chain with excessively high depth gauges will still cut slowly and require excessive force.
When to replace the chain instead of sharpening
Replace the chain (rather than sharpen) when the top plates of the cutters have been filed down to less than 4 mm in length — at that point there is not enough cutting material left for effective use. Also replace if you find cracks or bent links in the chain, if drive links are worn or deformed, or if the chain stretches past the adjustment range of the tensioner and cannot be kept taut. A chain that has been involved in a serious kickback incident or has struck a hard object at full speed should be replaced as a precaution, even if it appears undamaged — internal stresses in the metal may not be visible. A quality replacement chain for a standard domestic chainsaw costs £15–40 and takes five minutes to fit.
How Often Should You Sharpen a Chainsaw?
Sharpening frequency depends on how much you use the saw and what you cut. A good rule of thumb: sharpen after every 2–3 tanks of fuel burned through sustained cutting. For occasional users who fill the tank once or twice per season, sharpen once per season regardless of usage — a chain stored blunt is always slower to start cutting next time. Professional arborists sharpen multiple times per day for sustained production work.
The type of wood matters significantly. Cutting hardwoods (oak, hickory, ash) dulls a chain 2–3× faster than cutting softwoods (pine, fir, poplar). Dirty or sandy wood — anything that has been lying on the ground or has embedded grit — can blunt a chain in a single cut. If you ever feel the chain slow noticeably mid-cut, stop and check the chain before continuing. Forcing a blunt chain causes bar and sprocket wear that is far more expensive to repair than a routine sharpening.