What is compost and why make it at home?
Compost is decomposed organic matter that acts simultaneously as fertiliser, soil improver and biological activator. It is produced by the same microorganisms that break down organic matter in nature — bacteria, fungi, actinomycetes — but under controlled and accelerated conditions.
Unlike mineral fertilisers, compost does not just add nutrients: it improves soil structure (more spongy, better drainage), increases water-holding capacity (up to 20% more with regular amendments), introduces millions of beneficial microorganisms and stimulates root growth.
And reducing household organic waste by 30–50% is one of the individual actions with the greatest real environmental impact.
What can you add to a compost bin? (and what NOT to)
| ✅ YES — can be composted | ❌ NO — do not add to compost |
|---|---|
| Fruit and vegetable scraps | Meat, fish, bones |
| Coffee grounds and paper filters | Dairy products |
| Tea bags | Cooking oil |
| Crushed eggshells | Diseased plants (can spread disease) |
| Fresh grass clippings (in thin layers) | Weeds with ripe seeds |
| Dry leaves, straw | Carnivore faeces (dog, cat) |
| Cardboard and paper without coloured ink | Plastics, metals, glass |
| Shredded branches (under 1 in / 2 cm) | Coal ash |
| Wood ash (small amounts) | Pesticide-treated material |
The key to balance: you need to mix materials rich in carbon (browns: cardboard, dry leaves, straw, branches) with materials rich in nitrogen (greens: fruit scraps, fresh grass clippings, coffee grounds). The ideal ratio is roughly 2–3 parts brown to 1 part green. Too much green and the pile clumps and smells; too much brown and it takes a very long time to decompose.
How to make home compost step by step
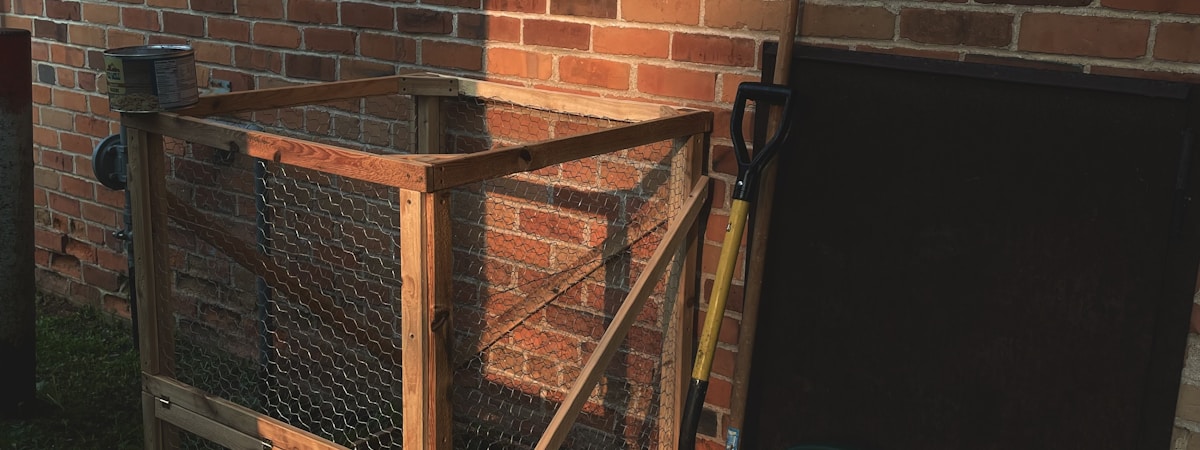
- Choose the spot and the composter. Place it in a semi-shaded spot, directly on the soil (so microorganisms and worms can access it), sheltered from strong winds. Do not put it right against the house wall or under a tree with shallow roots.
- Create a base of coarse materials. Start with a 4–6 inch (10–15 cm) layer of shredded branches, straw or torn-up cardboard. This base aids drainage and ventilation from below.
- Alternate brown and green layers. Add alternating layers of carbon-rich material (brown) and nitrogen-rich material (green), each about 4 inches (10 cm) deep. Do not add large amounts of the same material at once: fresh grass in thick layers forms an impermeable mat.
- Maintain the right moisture level. The pile should feel like a well wrung-out sponge: damp but not dripping. In summer it may need periodic watering. In winter it can be covered to avoid being waterlogged by rain.
- Turn every 2–3 weeks. Introduce oxygen by mixing with a fork. The heat in the centre (up to 140°F / 60°C) kills weed seeds and pathogens. A regularly turned pile produces compost in half the time of an unturned one.
- Collect the mature compost. In 3–4 months (in summer) or 6–12 months (in winter), the compost at the bottom will be ready. It smells of forest soil, is dark and crumbly. Extract it through the bottom hatch.
Speeding up your compost
If 3–6 months seems too long and you want finished compost in a matter of weeks, there are accelerators you can use. Compost activators (commercial products containing beneficial bacteria and fungi) can halve decomposition time if used properly. The key is turning: a neglected pile takes 12 months; a regularly turned pile takes 3–4 months; a very frequently turned pile (twice per week) can be ready in 6–8 weeks. The limiting factor is oxygen — the breakdown process is aerobic (requires oxygen), and every time you turn the pile, you introduce a fresh charge of air to the microorganism population.
The most effective acceleration technique is shredding: chop all materials (leaves, branches, cardboard) into small pieces before adding them to the composter. The increased surface area lets microbes work faster. A 2-second shred per kitchen scrap (apple core or vegetable peel) does not add much work but genuinely speeds decomposition by 2–3 weeks. Some gardeners use a hand shredder or run a lawnmower over cardboard or branches; others pay for a commercial shredding service for large quantities of pruning waste. The smaller the pieces, the faster the transformation.
The third acceleration method is balancing the green-to-brown ratio perfectly: too much brown and microbe activity slows (insufficient nitrogen); too much green and the pile becomes anaerobic and smelly. The optimal ratio is approximately 30 parts brown to 1 part green by volume (this sounds like a lot of brown, but remember leaves and cardboard compress to almost nothing). If you maintain this ratio and turn every 2 weeks, summer compost can be ready in 8–12 weeks.
Garden composter vs worm bin
Classic garden composter
The most common option for gardens and large patios. A recycled-plastic container (typically 80–200 gallons / 300–800 L) with a lid, side ventilation and a bottom hatch to extract the mature compost. It is the solution for composting large volumes of garden waste (grass, branches, leaves) and kitchen scraps.

VOUNOT Garden Composter 300 L
- ✓ 300 L capacity — high-density recycled plastic
- ✓ Lid with locking mechanism
- ✓ Side ventilation on all 4 panels
- ✓ Bottom extraction hatch
- ✓ Open base for direct soil contact
- ✓ Tool-free assembly
Price from Amazon.com · ships within US
Worm bin (red California worms)
A worm bin uses red California worms (Eisenia fetida) to transform organic waste into vermicompost: an exceptionally high-quality fertiliser in just 6–8 weeks. It is compact, practically odourless and ideal for flats, balconies or kitchens.
It produces two types of fertiliser: solid vermicompost (to mix into potting compost) and liquid leachate (the liquid that drains, diluted 1:10 with water and used as a powerful foliar or irrigation fertiliser).

WormBox Worm Composter — 3 Trays 48 L
- ✓ 3 stackable trays, 48 L total capacity
- ✓ Made from high-density recycled plastic (France)
- ✓ Tap to drain liquid leachate
- ✓ Ready vermicompost in 6–8 weeks
- ✓ Suitable for indoor and outdoor use
- ✓ Expandable: add extra trays as needed
Price from Amazon.com · ships within US
How to use compost in the garden and vegetable patch
In the vegetable garden: Incorporate 1–2 inches (3–5 cm) of mature compost into the surface layer of the soil before planting (spring and autumn). Mix it into the top 6–8 inches (15–20 cm). For pots and raised beds, blend compost at 20–30% into the growing medium.
As mulch: Apply 1–2 inches (3–5 cm) of semi-mature compost around the base of trees, shrubs and perennials. It retains moisture, regulates soil temperature and slowly incorporates itself.
On the lawn: Sieved compost (passed through a 1 cm / 0.4 in mesh) spread over the lawn in spring and watered in activates the soil's microbial life and noticeably improves drought resistance.
As a planting boost: Add a handful of compost to the planting hole for any new plant: shrubs, fruit trees, vegetable patch plants. Young roots develop much faster.
For more ideas on making the most of your vegetable garden, visit our complete vegetable garden guide.
Common problems and how to fix them
| Problem | Likely cause | Solution |
|---|---|---|
| Bad smell (rotting) | Too much moisture or lack of oxygen | Turn the pile, add torn cardboard, aerate |
| Ammonia smell | Too much green (nitrogen-rich) material | Add brown material (cardboard, dry leaves) and turn |
| Pile not heating up | Too dry, too small or insufficient nitrogen | Water it, add green material, ensure minimum volume (35 cu ft / 1 m³) |
| Rodents appearing | Protein scraps or cooked food | Remove those materials, use a closed composter with solid base |
| Excessive flies | Fresh scraps exposed on surface | Bury fresh scraps beneath a layer of brown material |
Greens vs Browns: Achieving the Perfect C:N Ratio
The secret to fast, effective composting is balance. Too many "greens" (nitrogen-rich materials) and your pile smells like ammonia and becomes a slimy anaerobic mess. Too many "browns" (carbon-rich materials) and decomposition stalls—you're left with a dormant pile that takes 2+ years. The gold standard is a C:N ratio of 25–30:1 (25–30 parts carbon for every 1 part nitrogen), which translates roughly to 3 parts brown to 1 part green by volume.
Greens (nitrogen-rich, moisture-promoting): kitchen scraps (fruit, vegetables, eggshells), coffee grounds, grass clippings (fresh), manure (especially horse and chicken), plant trimmings, seaweed. These are "hot" materials that heat up the pile quickly. A single 10 cm layer of fresh grass clippings can spike pile temperature to 60°C within 48 hours if there's sufficient carbon around it. The problem: if greens dominate, they compact and exclude oxygen, producing that rotten smell.
Browns (carbon-rich, structure-providing): dry leaves, shredded paper/cardboard, straw, wood chips, sawdust (untreated), newspaper, dried grass. These are "cold" materials that create air pockets and slow decomposition. A proper brown layer (10–15 cm thick) allows oxygen to flow through the pile, which keeps it aerobic and odor-free.
Optimal layering (the "lasagna" method):
- Layer 1: 20 cm browns (leaves, cardboard)
- Layer 2: 5 cm greens (grass clippings, food scraps)
- Layer 3: 20 cm browns
- Layer 4: 5 cm greens
- Repeat until bin is full
This alternating pattern maintains airflow while ensuring steady decomposition. Each green layer adds nitrogen to activate the pile; each brown layer adds carbon and structure. If you're getting ammonia smell after layering, it means greens have shifted and compacted. Solution: turn the pile and add more browns on top.
Quick test for balance: A properly balanced pile smells earthy (like forest floor), not rotten or like urine. If you catch a whiff of ammonia, add 3 volumes of browns for every 1 volume of greens you estimate is in the pile, turn, and wait 2 weeks.
Troubleshooting Deep Dive: When Composting Stalls
The table above covers the basics, but here's the extended diagnosis guide for stubborn problems:
Scenario: Pile not heating up (stays cold, slimy, smells like wet leaves) This is the most common beginner mistake. Causes: (1) insufficient volume—a pile needs at least 35 cubic feet (1 m³) to generate internal heat; smaller piles lose heat too fast; (2) too much water or no drainage; (3) insufficient nitrogen (too many browns, not enough greens); (4) compaction blocking airflow. Fix: If the bin is too small, start over in a larger container or build an open pile. If it's large enough, add nitrogen (grass clippings, manure, food scraps) and turn the pile to reintroduce oxygen. If it's waterlogged, add coarse browns (straw, wood chips) and ensure drainage. Check that your browns are loose, not tightly packed.
Scenario: Rotten smell (like rotten eggs or sewage) This indicates anaerobic conditions—zero oxygen. Causes: too much moisture, too much green material, or compaction. The pile is fermenting rather than decomposing. Fix: Turn immediately. Add 1 part brown material (by volume) for every 1 part of current pile. If the pile is waterlogged, the fix is structural: build a new pile on a well-draining surface or drill holes in the bin base. Do not add water for at least 2 weeks.
Scenario: Ammonia/urine smell You have too much nitrogen and not enough carbon. Greens have dominated and shifted into a compact, anaerobic layer. Fix: Turn the pile thoroughly, mixing browns throughout. Add 2–3 volumes of coarse browns (leaves, straw, shredded cardboard) per 1 volume of pile. Turn again after 5 days. This smell should fade within 1–2 weeks.
Scenario: Rodents in the bin Your bin contains meat, fish, cooked food, or dairy. These attract mice and rats instantly. Fix: (1) Remove all animal products—you can't get them back; (2) Switch to a closed composter with a solid base and rodent-proof lid; (3) Add a layer of 15 cm of dense brown material (straw, compressed cardboard) on top to seal the surface. Future composting: fruit and vegetable scraps only; no cooked food, meat, dairy, or oil.
Scenario: Excessive flies (fruit flies, soldier flies) Fresh, exposed food scraps on the surface attract insects. Fix: (1) Bury all new additions 10–15 cm deep under a layer of browns; (2) Cover the pile top with a cardboard sheet or plastic lid; (3) Ensure airflow by keeping the pile loose, not compact. The flies feed on the surface layer—burying food denies them access. This fixes the problem within 3–5 days.
Scenario: Compost isn't breaking down (after 6 months, still looks like raw materials) This usually means the pile never heated up (see first scenario) or the material is too coarse. Wood chips and untreated sawdust take 2+ years to break down alone. Fix: If it's mostly leaves and paper, add nitrogen (grass, manure, food scraps) and turn weekly. If it's mostly wood or chips, either turn it frequently (every week) or accept a longer timeline (18–24 months). To speed it up, add nitrogen and moisture, then turn every 7–10 days.
Using Finished Compost: Application Rates and Best Practices
Finished compost is black, crumbly, and smells earthy. You shouldn't see recognizable food scraps or leaves—everything has broken down into a uniform, soil-like texture. Now comes the question: how do you apply it?
Application rate: 2.5–5 cm per season is the standard recommendation for garden beds. For a 1 m² bed, that's 25–50 liters of compost. For vegetables in containers, mix finished compost as 20–30% of the growing medium (the rest being universal potting compost and perlite). For a 50-liter pot, that's 10–15 liters of finished compost.
Timing application:
- Spring (March–May): Apply 2.5 cm of compost to garden beds and work it into the top 5 cm of soil. This adds nitrogen and organic matter before the growing season. Wait 2 weeks before planting vegetables directly into freshly amended soil.
- Fall (September–October): Apply 2.5–5 cm of compost as a top-dressing. Soil organisms will incorporate it over winter, improving structure for spring planting. This is less urgent than spring but valuable for long-term soil building.
- Year-round (for containers): Refresh container soil every 2 years by replacing the top 5 cm with finished compost. This replenishes nutrients without complete soil replacement.
Key mistake: applying immature compost
Some gardeners harvest compost when it's still only 50% decomposed. The material looks like finished compost but still contains live bacteria fermenting nitrogen-rich materials. When you apply half-finished compost to a bed, those bacteria consume available nitrogen, starving your plants. Result: yellowing plants, stunted growth, for 4–6 weeks until the compost fully finishes decomposing in the soil. Always wait for the 2–3 year mark (or test: a handful should break apart easily and smell earthy, not like wet leaves).
Avoiding nutrient lock: If you apply fresh compost (not fully finished) to a vegetable bed, wait 3–4 weeks before planting. This gives the remaining decomposition time to complete without competing with plant roots for nitrogen.
pH and soil amendment: Finished compost is pH-neutral (around 6.5–7.0) and is safe for all plants. If your soil is acidic (pH < 6.0), the slow lime in compost (especially if manure-based) will gradually raise pH over 2–3 seasons of annual applications. If your soil is alkaline (> 7.5), finished compost won't significantly lower pH—you'll need elemental sulfur for that.