▷ Best compost bins for 2026
The best compost bin for your garden depends on your space, the volume of organic waste you generate, and how fast you want results. For most backyard gardeners, an 80-gallon (300L) stationary bin offers the ideal balance of capacity and simplicity:
EJWOX 80 Gallon (300L) Garden Compost Bin – Static with Aeration System
- ✓ 300L static compost bin — multi-panel aeration system
- ✓ BPA-free polypropylene, UV-resistant
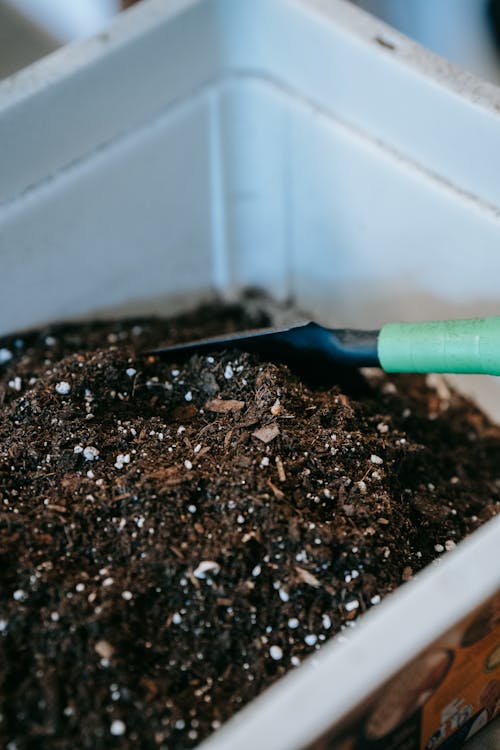
- ✓ Easy-access bottom hatch for finished compost
- ✓ Lightweight snap-together assembly — no tools required
Price from Amazon.com · ships within US
BPA-free tumbler composter
Tumbler composters speed up decomposition by making it easy to turn the pile — essential for hot composting that finishes in 4–6 weeks:
Large Garden Compost Bin 80 Gallon – BPA-Free Tumbler for Fast Compost
- ✓ 80-gallon BPA-free compost tumbler
- ✓ Dual chamber for continuous composting
- ✓ Turns easily for aeration — hot composting method
- ✓ Finished compost in as little as 3 weeks in summer
Price from Amazon.com · ships within US
Budget-friendly 300L composter
Azaeahom 80 Gallon Garden Compost Bin – Easy Assembly, Multiple Vents
- ✓ 300L garden compost bin with large vent openings
- ✓ BPA-free PP material — bottom access door
- ✓ Easy snap-together assembly, no tools required
- ✓ Multiple vents for maximum aeration and faster decomposition
Price from Amazon.com · ships within US
Types of composting: bin, tumbler, worm
Stationary compost bins
Stationary bins are the lowest-maintenance option: you add material to the top, microorganisms do the work, and you harvest from the bottom hatch. They take 6–12 months to produce finished compost (cold composting method) but require almost no effort. Best for gardeners with moderate volumes of waste and no hurry for results.
Compost tumblers
Tumblers speed up composting by making turning easy. Spin the drum every 2–3 days to introduce oxygen, maintain moisture, and keep temperatures high. With good management, tumblers produce finished compost in 4–8 weeks — ideal for gardeners who want quick results or have pests that might access an open bin.
Vermicomposting (worm bins)
Vermicomposting uses red wigglers (Eisenia fetida) to convert food scraps into worm castings — the most nutrient-dense organic fertilizer available. Worm bins work indoors, are odorless when managed correctly, and process waste quickly. The liquid worm tea produced is an excellent liquid fertilizer. Best for apartment dwellers or those with limited outdoor space.
Comparison: which composting method is right for you?
Not all composting methods suit every gardener or situation. The following table outlines the key differences in speed, effort, cost, and suitability:
| Method | Time to Finished Compost | Effort Level | Cost | Best For |
|---|---|---|---|---|
| Cold Stationary Bin | 6–12 months | Low (set and forget) | $80–150 | Most homeowners; no patience required |
| Hot Composting (Manual Turning) | 4–8 weeks | High (turn every 3–7 days) | $60–100 | Gardeners with large volume waste; need fast results |
| Tumbler (Spinning) | 3–6 weeks | Medium (spin 2–3x per week) | $150–350 | Pest-conscious gardeners; want control and speed |
| Vermicomposting (Worms) | 3–6 months | Medium (feed and maintain moisture) | $100–250 | Apartment dwellers; year-round composting needed |
| Bokashi (Fermentation) | 2–3 months (plus digging in) | Low (just add, wait, bury) | $80–200 | Meat/fish/dairy waste; limited space |
Quick answer: Start with a cold stationary bin if you have space and can wait. Move to a tumbler if rodent problems develop or you want faster results. Try vermicomposting indoors or bokashi if you have limited outdoor space. Hot composting suits experienced gardeners with large waste volumes.
What to compost: greens, browns and what to avoid
Greens (nitrogen): vegetable and fruit scraps, coffee grounds and filters, tea bags, fresh grass clippings, plant trimmings, seaweed. Browns (carbon): dry leaves, cardboard (torn up), newspaper, straw, wood chips, paper bags. The ideal ratio is roughly 2–3 parts browns to 1 part greens by volume.
Never compost: meat, fish, dairy, cooked food (attract rodents), diseased plants (spread pathogens), invasive weeds with seeds, pet waste (disease risk), or treated wood products (contain chemicals harmful to soil biology).
Hot composting vs cold composting
Cold composting is passive — you add material and wait. Takes 6–12 months but requires almost no effort. Works well for most home gardeners. Hot composting involves building the pile to the right size (at least 3×3×3 feet), balancing greens and browns, maintaining moisture, and turning every 3–7 days to sustain temperatures of 130–160°F. At those temperatures, weed seeds and pathogens are killed, and compost finishes in 4–8 weeks. Hot composting requires more effort but produces faster results and safer compost.
Compost troubleshooting: smells, pests, slow decomposition
Even with the best intention, compost can run into problems. The good news: every issue has a solution, and most are fixed by adjusting the balance of greens, browns, moisture, or aeration. Here's how to diagnose and fix the most common problems:
Eliminating odors in your compost
Ammonia smell (like cat urine): This signals too many greens (high nitrogen) in your pile. Fix by adding 2–3 times as much brown material (dry leaves, cardboard, straw) by volume. Also turn the pile if possible to introduce oxygen. The ammonia smell should fade within a few days. Future prevention: maintain a 2:1 or 3:1 brown-to-green ratio.
Rotten egg smell (sulfurous, like sewage): This is anaerobic decomposition — bacteria are working without oxygen because the pile is too compacted or wet. Immediately turn the pile to aerate it, and add more dry browns to improve drainage. If the pile is soggy, cover it from rain and add a layer of straw or wood chips to the top. The smell usually disappears within a week of turning.
No smell at all, but pile isn't heating: The pile is inactive because it lacks nitrogen. Add fresh greens (grass clippings, food scraps, coffee grounds) and moisten to 50% moisture content. Turn to mix in the fresh material and restore microbial activity. A healthy hot compost pile should smell slightly earthy and reach 130–160°F within 2–3 days of fresh additions.
Sweet, musty smell (like spoiled fruit): Often temporary and part of normal decomposition. If the smell is pleasant and the pile is heating, you're on track. If it's unpleasant, add browns and turn to improve air flow.
Managing pests and unwanted creatures
Rodents (rats, mice): The biggest threat to outdoor compost. Prevention is better than control: never compost cooked food, meat, fish, or dairy, as these attract rodents strongly. Bury all food scraps at least 8 inches deep in the pile. Use a bin with a solid metal or sturdy plastic base (not open-bottom designs that rats can burrow under). If rodents are already present, switch to a fully enclosed tumbler composter. Some gardeners apply a thin layer of lime or cinnamon on top of food scraps to deter rodents, though evidence is mixed.
Flies (fruit flies, fungus gnats): Common in summer, especially if the pile is too wet or has exposed fruit. Cover food scraps with browns (leaves or cardboard) immediately. Keep the pile drier by adding more browns and reducing watering frequency. Ensure the bin has air vents to prevent stagnation. Covered tumblers prevent flies altogether.
Slugs and snails: Generally harmless — they're helping decompose material. If they bother you, the bin is probably too wet. Reduce watering and improve drainage by adding more browns.
Wasps and yellowjackets: Usually present because the pile has decomposing fruit or sweet materials. Bury these materials immediately. Wasps are actually beneficial because they prey on fly larvae, so tolerance is ideal.
How to use finished compost in your garden
Finished compost improves every type of soil: it opens up heavy clay, adds moisture retention to sandy soil, feeds soil microorganisms, and provides a slow-release source of all plant nutrients. The carbon-to-nitrogen ratio in mature compost is roughly 12:1, making it an ideal all-purpose amendment.
For vegetable beds: Apply 2–4 inches of finished compost in spring and work it into the top 6 inches of soil. For continuous beds, repeat every fall as a 1–2 inch layer to build soil structure over years. Sandy soils benefit from the higher end of this range (4 inches) because compost dramatically improves water retention. Clay soils also benefit (4 inches) because compost improves drainage and structure.
For perennial borders and shrubs: Top-dress with 1–2 inches of compost in early spring and again in fall. Do not bury compost under deep mulch — a thin layer at the soil surface allows it to slowly incorporate as soil organisms work. This approach feeds plants and improves soil year after year without digging.
For containers and raised beds: Mix finished compost into potting mix at 20–30% by volume. This reduces the need for synthetic fertilizers during the growing season. For containers with perennials, refresh the top 2–3 inches with fresh compost each spring.
For lawns: Apply a thin compost top-dressing (0.25 inch) in spring and fall to improve soil biology and reduce disease. This is gentler than deep tilling and doesn't interrupt the turf.
Important note: Compost is essentially impossible to over-apply. Unlike synthetic fertilizers (which burn plants at high concentrations), compost cannot harm plants no matter how much you use. More compost equals more organic matter, which always benefits soil structure and biology.
For more vegetable garden guides, see our Vegetable Garden Guide.
Advanced: Deep Dive into Hot and Cold Composting Strategies
While both methods produce usable compost, understanding the chemistry and biology behind each helps you choose the right approach and troubleshoot when things go wrong.
Cold Composting — The Passive Method: Cold composting relies on ambient temperatures and the natural activity of mesophilic bacteria, fungi, and decomposer organisms that thrive at room temperature (50–86°F). Over 6–12 months, these organisms slowly break down organic material through aerobic respiration (using oxygen). The advantage is minimal effort — no turning required, no moisture management needed beyond natural rainfall. The disadvantage is speed: you're waiting months for finished compost. Additionally, weed seeds and disease pathogens survive cold compost temperatures, so if your pile contains invasive weed seeds or diseased plant material, those problems may transfer to your garden. Cold composting works best for gardeners with moderate waste volumes and no time pressure.
Hot Composting — The Active Method: Hot composting accelerates decomposition by creating an environment that favors thermophilic bacteria, which thrive at 130–160°F. These bacteria are extremely efficient at breaking down organic matter and generating heat as a byproduct. To achieve this: 1. Build a pile at least 3×3×3 feet (smaller piles lose heat too quickly) 2. Layer greens (food scraps, grass) and browns (dry leaves, cardboard) in roughly equal parts by volume 3. Maintain moisture like a wrung-out sponge (50–60% moisture) 4. Turn the pile every 3–7 days to introduce oxygen and redistribute materials When managed correctly, hot piles reach 130–160°F within 2–3 days and finish compost in 4–8 weeks. The heat also kills weed seeds and disease pathogens, producing safer compost. The tradeoff is effort — regular turning is non-negotiable. Hot composting suits gardeners with large waste volumes (vegetable gardens, landscaping work) or those concerned about seeds and pathogens.
Hybrid Approach: Many experienced gardeners use a hybrid: maintain one active hot pile (turned regularly) while a second passive pile slowly composts. This gives the best of both worlds — quick finished compost from the active pile and continuous decomposition from the passive one.
Complete List: What NOT to Compost and Why
Knowing what to avoid is just as important as knowing what to add. Here's a detailed breakdown of materials that should never enter your compost bin:
Meat and Fish (Never): Raw or cooked, these materials attract rats, raccoons, and opossums that will tear apart your compost bin looking for food. Additionally, meat and fish decompose anaerobically (without oxygen), producing foul-smelling hydrogen sulfide and ammonia. The smell can persist for weeks. If you must compost meat scraps, use a bokashi bin (fermentation system) designed to handle these materials — bokashi produces a solid that can then be buried in a garden bed where it finishes decomposing underground, away from pests.
Dairy Products (Never): Milk, cheese, butter, yogurt attract pests and create strong odors. Additionally, dairy takes a long time to decompose compared to plant matter. Use bokashi or bury dairy waste directly in the garden at least 12 inches deep.
Cooked Food (Never): Cooked vegetables, grains, oils, and spices attract rodents. Even "safe" items like cooked pasta or rice should not be composted in a standard bin. Use bokashi or bury directly in the garden.
Diseased Plants (Never): Compost piles don't always reach temperatures high enough to kill fungal or bacterial pathogens. If your tomato plant had late blight, powdery mildew, or any obvious disease, dispose of it in the trash or burn it. Do not compost diseased plants — you'll spread the disease throughout your garden when you apply the finished compost.
Weed Seeds (Avoid): Mature weeds with viable seeds should not go in a cold compost pile (most home gardeners' piles don't reach killing temperatures). Use a hot pile if you must compost weeds, or bag them for trash. The most problematic weeds are perennials with persistent seeds: dandelion, chickweed, thistle. One mature chickweed plant produces 15,000 seeds — do not compost it.
Pet Waste (Never): Dog or cat feces contain pathogens harmful to humans, including E. coli, Salmonella, and parasites. These pathogens survive in home compost and can cause illness if contaminated compost is used on vegetables. Pet waste requires a dedicated pet-waste composter or should be bagged and disposed of.
Treated Wood, Glossy Paper, Coal Ash (Never): Treated lumber, cardboard from electronics, glossy magazines, and coal ash contain chemicals (heavy metals, dyes, synthetic binders) that persist through composting and accumulate in soil. Use untreated cardboard, newspaper, and clean wood chips only. Wood ash from a wood stove can be composted in small quantities, but coal ash should never be used.
Citrus Peels and Onion Skins (Use Sparingly): Large amounts of citrus can slow decomposition due to antimicrobial compounds in the rind. Onion and garlic skins can also slow the process. Use sparingly — a few peels are fine, but don't load the bin with them. Shred them to speed decomposition.
Pine Needles and Walnut Leaves (Avoid): Pine needle acidity and the chemical juglone in walnut leaves can inhibit decomposition and harm plants if overused. If you have large quantities, compost separately or let them break down on the ground as natural mulch.
Advanced Troubleshooting: When Compost Goes Wrong
Beyond the basic odor and pest issues, here are more advanced problems and their solutions:
Pile Not Heating Up (Cold Spot): A pile should heat within 2–3 days of reaching minimum mass (3×3×3 feet) and proper moisture. If it stays cold: - Check the brown-to-green ratio: if you have mostly browns, add fresh greens (grass, food scraps). - Check moisture: the pile should feel like a wrung-out sponge. If it's dry, add water slowly while turning. - Check pile size: if it's smaller than 3×3×3 feet, materials don't insulate the center, so heat is lost. Add more material or use a tumbler composter which retains heat better. - In winter, heating slows dramatically due to cold ambient temperatures — this is normal. Wait for spring.
Compost Maturation Plateau (Slow Finish): After 6–8 weeks, a hot pile may plateau — it stops heating but still contains recognizable material. This usually means: - The pile has consumed most of its nitrogen and is now limited by carbon availability. - Solution: Add fresh greens and moisture, then turn again. This restarts the hot phase. - Alternatively, move the material to a passive pile and wait for cold composting to finish (4–6 more months).
Compost Too Wet (Waterlogged, Anaerobic): Excessive rain or overwatering creates a waterlogged, smelly mess. The pile becomes anaerobic (oxygen-depleted) and produces rotten egg smell. - Solution: Turn immediately to introduce air. Add dry browns (cardboard, straw, dry leaves) to absorb water and improve drainage. Cover the pile from further rainfall with a tarp or move it to a covered location. The smell should improve within 24 hours of turning.
Compost Too Dry (No Activity): In arid climates or hot summers, compost can dry out completely, halting decomposition. - Solution: Water the pile as you add new material. Mix in fresh, moist greens (food scraps, fresh grass). Moisture should be 50–60% — if you squeeze a handful, a few drops of water should come out. Tarp the pile during extended dry periods to retain moisture.
Incomplete Decomposition (Large Chunks Remain): Even "finished" compost may contain chunks of cardboard, wood, or leaf stems that don't fully decompose. - This is normal and harmless. Simply sift the finished compost through a 0.5-inch screen. Large chunks go back into the next batch for further decomposition. The sifted fine material is ready to use immediately.