

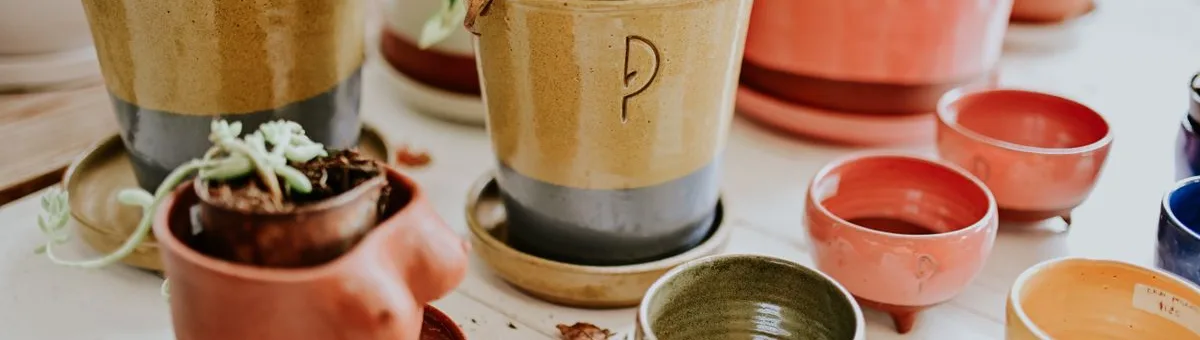
Compare the finish and material details
Product labels such as glazed, unglazed or terracotta describe different finishes, but they do not tell you everything about a particular pot. Ask what the container is made from, how the surface is finished and whether the maker gives indoor or outdoor care guidance. Do not assume all ceramic pots retain or release moisture at the same rate.
Think about the plant and your watering routine. A removable plastic nursery pot inside a decorative ceramic cover can simplify watering and cleaning. A plant placed directly into its ceramic container needs a suitable growing medium and a usable way for excess water to drain.
Check drainage and usable dimensions
Look for a drainage hole and confirm that water can leave the root zone. If the decorative pot has no hole, keep the plant in a removable inner pot and empty the outer vessel after watering. A layer of stones at the bottom does not replace a drainage opening; see the University of Illinois Extension guidance on container drainage options.
Measure the inner opening and depth, not just the outer diameter. Compare these dimensions with the plant’s current root ball and repotting needs. A pot that is much larger than the root system can make moisture management harder, while a narrow opening can make future removal difficult. Penn State Extension’s repotting guide explains what to consider when moving a houseplant to a new container.
Plan where the pot will sit
Before filling a ceramic pot, consider how you will lift and move it once it contains wet medium and a mature plant. Check the shelf, table or floor surface and use a saucer or mat that protects it from drips. For outdoor use, read the maker’s instructions for the finish and local temperature conditions; do not assume a pot is suitable for frost exposure from its appearance alone.
Match the pot’s opening and shape to the plant’s root ball, not just to the room décor. Leave enough room to water without splashing and enough access to inspect the soil and leaves. If the pot has a narrow neck or an unusual interior shape, make sure the plant can be removed without damaging roots.
Use a ceramic pot checklist
- Does it have a drainage hole, or will you use a removable inner pot?
- What are the usable interior width and depth?
- What material and finish does the manufacturer specify?
- Where will excess water go, and what surface will the pot stand on?
- Can you safely move the pot after it is filled?
- Does the maker say it is suitable for the planned indoor or outdoor conditions?
For other materials and general sizing advice, return to the plant pots guide, then compare fiberglass and plastic containers by their published specifications.
Choose between a planted pot and a cachepot
A ceramic container without a drainage hole is often easiest to use as a cover pot: leave the plant in a removable nursery container, water it separately, let it drain and then return it to the ceramic vessel. Check the bottom of the cover pot after watering so excess water is not left around the inner pot.
If planting directly into the ceramic pot, confirm that it has an open drainage hole and that the saucer does not block it. Place a mesh screen over a large opening only if it does not obstruct water flow. Do not add a layer of gravel as a substitute for drainage; the pot still needs an outlet. The University of Illinois Extension pages on drainage options and container materials explain these practical differences.
A cachepot can also help contain drips on a shelf, but it should not become a hidden reservoir unless the plant and system are designed for that use. Remove the inner pot periodically to inspect for standing water, roots growing through the drainage holes or mineral residue.
Measure and repot without guessing
Measure the root ball and the usable interior of the ceramic pot. The outside diameter can be misleading because thick walls and a narrow opening reduce the space available to roots. Check the inner width at the narrowest point, the pot depth and the size of the drainage opening. Keep a note of measurements if you are ordering online.
Choose a pot that gives the roots appropriate room without leaving a large volume of unused wet medium around them. The right size depends on the plant and its growth rate; follow species-specific advice rather than choosing solely by visual proportion. When a plant needs repotting, remove it carefully, inspect the roots, loosen only what the guidance permits and use fresh medium suited to its needs. Penn State Extension explains signs and steps in its houseplant repotting guide.
Before filling a large ceramic planter, position it where it will remain or use a safe way to move it. A filled container is heavier and more awkward than an empty one. Protect floors and furniture with a stable saucer or mat that can support the pot and catch runoff without covering its drainage opening.
Care for ceramic pots through changing weather
Ask whether the specific ceramic pot is porous and whether the manufacturer gives weather limits. Porous materials can lose water faster, and water held in pottery can expand when frozen and crack the container; Illinois Extension advises protecting pottery in winter. Move the pot to a sheltered place or follow the maker’s storage advice when freezing conditions are expected. Do not assume a decorative finish makes an outdoor pot frost-safe.
Inspect the pot for cracks, chips and blocked holes before each new planting. A small surface mark may be cosmetic, while a crack that reaches through the wall can affect stability or cause leakage. Avoid lifting a filled pot by its rim or handles unless the maker says they are designed for that load. Clean according to the finish instructions and avoid abrasives that could scratch glaze or painted surfaces.
In a hot sunny site, monitor the root-zone moisture rather than relying on a universal rule for ceramic pots. Container size, wall thickness, glaze, plant and exposure all affect drying. A removable liner makes it easier to compare moisture and adjust watering without repeatedly moving the entire planter.
Match the ceramic pot to the use case
| Use | Check before choosing |
|---|---|
| Small indoor plant | Drainage, inner dimensions, saucer fit and an easy-to-remove inner pot |
| Large floor planter | Filled weight, floor protection, access to runoff and how the plant will be moved |
| Outdoor seasonal display | Maker’s temperature guidance, sheltered storage and drainage in heavy rain |
| Decorative cachepot | Inner pot fit, ease of lifting and a way to empty collected water |
Use appearance as the final filter after the functional checks. A beautiful pot is less useful if it cannot drain, cannot be moved safely or prevents you from reaching the plant. For different materials, compare our fiberglass planter checklist and plastic pot guide.
Store and protect ceramic pots between plantings
When a pot is empty, remove soil and plant debris before storing it. Check the surface and drainage hole, then let the container dry. Follow the maker’s instructions for any finish or decorative coating. If the pot will be exposed to freezing temperatures, protect it from water collecting inside; Illinois Extension notes that water held in pottery can expand as it freezes and crack the material.
Choose a storage position that prevents the pot from tipping or striking other containers. Do not stack heavy ceramics unless their shape and the manufacturer’s guidance make stacking safe. Wrap or separate finished surfaces if contact could scratch them, and keep the drainage opening clear. For a large pot, use a safe lifting method and ask for help rather than gripping a narrow rim.
Before replanting, confirm the pot is stable, free from through-cracks and suitable for the intended location. A chipped rim may be a handling hazard, while a cracked base can leak onto floors or a balcony. If you cannot tell whether damage affects its stability, use the pot as a decorative cover only if it can contain the inner pot safely, or retire it.