

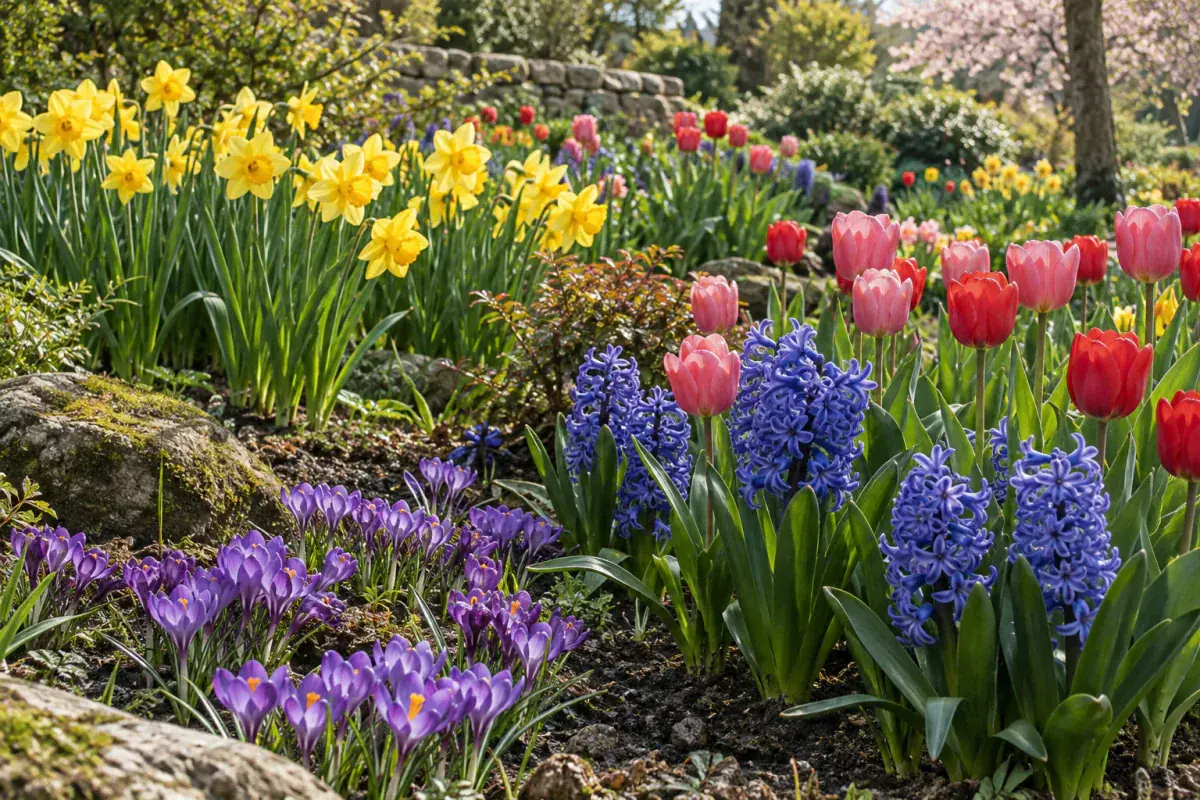
Choose bulbs for your winter conditions
Compare bloom season, mature height, light requirements, and whether a bulb is likely to return in your climate. Daffodils often persist where conditions suit them; hybrid tulips may give their strongest show in the first season in areas with warm winters or wet summers. These are tendencies, not guarantees. For warm climates, select cultivars recommended locally rather than applying a generic refrigerator-chilling schedule.
Plant by species, depth, and drainage
In cold-winter areas, plant hardy bulbs in autumn while soil can still be worked. Follow package directions; a broad rule is a depth around two to three times the bulb’s diameter, adjusted for soil and species. Point the growing tip upward and water after planting. Avoid sites where winter water collects. See University of Minnesota Extension’s bulb guide for climate-specific context.
Care after flowers fade
Remove faded flowers if desired, but leave healthy leaves until they yellow naturally. Green foliage is rebuilding the bulb. Do not braid or cut it early. If bulbs become crowded or flower poorly, wait until foliage dies back before lifting and dividing them.
To extend the display, combine early-, mid-, and late-season varieties, checking actual bloom time for the cultivar and region. Layering several bulb types in one pot can work when planting depth and moisture needs are compatible; leave enough room for roots and drainage. For species-specific information, see NC State Extension’s Narcissus profile and its Tulipa profile.
Build a staggered spring display
Choose a few bulbs with different expected flowering windows, then verify timing for the named cultivars in your region. Plant labels often give a broad early-, mid-, or late-season range; local temperatures can shift it. Mix heights thoughtfully so shorter flowers are not hidden behind taller stems, and leave space for fading leaves after bloom.
Use a container only if it can drain
Outdoor bulb pots must have open drainage and enough depth for the selected species. Containers experience colder and faster-changing conditions than garden soil, so choose a pot rated for outdoor winter use and protect it according to local advice. After flowering, keep leaves until they yellow. Do not force bulbs indoors using a generic chilling period: species and cultivar requirements differ.
Compare common spring bulbs by role and season
Spring bulbs are not one crop with a single schedule. Compare the species and cultivar label for flowering window, depth, spacing, light, and repeat performance. Common choices such as crocus, snowdrops, daffodils, tulips, and hyacinths can overlap in bloom time, but local weather shifts the display. Use the table to plan a mix, then verify instructions for each bulb you buy.
| Bulb group | How it can contribute | What to verify |
|---|---|---|
| Snowdrops and early crocus | Early color close to paths, lawns, or the front of a bed | Planting depth, site moisture, and whether the chosen type suits your region. |
| Daffodils | Mid-season mass planting and a strong chance of long-term persistence in suitable sites | Cultivar timing, mature height, drainage, and pet-safety precautions. |
| Tulips | Wide color and flower-form choices for a focal display | Winter chill, summer moisture, and whether the cultivar is recommended to naturalize. |
| Hyacinths and other fragrant bulbs | Fragrance near seating or entrances | Local climate, bulb condition, and spacing from the supplier’s guide. |
| Alliums and later bulbs | Carry interest toward late spring or early summer | Bloom time, mature height, and compatibility with neighboring plants. |
Do not choose a mix by package photo alone. A pre-packed blend may contain bulbs with different depths or light preferences, and the package should explain how to plant them. If one layer is meant to sit above another in a “lasagna” container, follow a supplier’s instructions for the exact species and pot depth. Where the directions conflict, separate the bulb groups into different containers rather than forcing an unsuitable depth.
Map the bed before ordering bulbs
Walk the site during the season when bulbs will be growing, not only when you are buying them. Note which areas receive sun before and after deciduous trees leaf out, where water stands after rain, and which patches are disturbed by foot traffic. Mark the locations of later perennials so the yellowing bulb foliage can remain in place without making the bed look neglected.
Sketch broad drifts or small repeated groups instead of scattering single bulbs in a regular grid. A repeated group gives color from a distance and is easier to identify when foliage emerges. Place short early bulbs near a path edge and taller later bulbs farther back, but use mature height and cultivar information, not the size of the package image. Leave access for deadheading and weeding.
When planning a sequence, select named varieties with different expected bloom periods and keep their labels. Make a simple map showing the count and position of each group. A bloom window printed on a package is approximate: local temperatures and exposure can make the same cultivar flower at different times. Add notes after the season so you can shift the next order based on what actually happened in your garden.
Choose companion plants that will not require you to remove bulb leaves early. Groundcovers and later-emerging perennials can hide fading foliage, but avoid vigorous plants that smother bulbs or make digging impossible. If you plan to naturalize bulbs in lawn, check local recommendations about mowing timing and the selected species; wait until the leaves have yellowed before cutting the area.
Follow a reliable bulb-planting workflow
Inspect the bulbs: choose firm bulbs and avoid those with extensive soft rot, mold, or damage. Plant promptly and follow supplier storage instructions if the bed is not ready. Keep different types labeled to prevent later confusion, especially when bulbs vary in depth or cold needs.
Prepare soil across the bed: loosen the planting area to the recommended depth and improve drainage at the site level where needed. Avoid creating small isolated pockets of rich soil in compacted ground, which can hold water around bulbs. Do not add fertilizer by habit; follow a soil test or extension guidance if the bed needs nutrients.
Place each group correctly: use the depth and spacing on the label. A general depth rule based on bulb diameter is only a starting point and does not replace directions for a particular species. Set pointed bulbs tip-up where visible. For flat or irregular bulbs, follow the package; if orientation is unclear, placing it on its side is usually preferable to forcing it into a position.
Water and label: water after planting if soil is dry, then avoid saturating the bed. Record the name, date, and placement. This information helps diagnose missing blooms and prevents later digging from disturbing a dormant bulb. In a container, verify that every drainage hole is open before watering.
Troubleshoot weak or missing spring displays
| Display problem | Questions to ask | Next step |
|---|---|---|
| No shoots in a planted area | Was the bulb firm, planted at the label depth, and suited to the local climate? | Wait for the species’ expected emergence window and avoid digging until the bulb can be located. |
| Leaves but few flowers | Was foliage removed early, did shade increase, or are bulbs crowded? | Keep leaves after bloom and review spacing and sun during the active growth period. |
| Bulbs rot or disappear | Does water pool, or is there evidence of wildlife digging? | Improve site drainage and ask a local extension about animal-specific exclusion. |
| Blooms finish all at once | Were varieties selected for the same period or exposed to a warm spell? | Choose a wider spread of cultivar bloom windows next season. |
| Container bulbs fail after winter | Can the pot drain, and was it exposed to severe freeze-thaw cycles? | Use a suitable outdoor container and follow local winter-protection advice. |
Bulb problems can involve climate, storage, drainage, animals, or the natural life cycle. Do not apply a pesticide until a target has been identified and the product is labeled for the plant and setting. If rotting continues across a bed, seek a local diagnosis and include photos, bulb type, soil conditions, and recent watering or weather.
Plan care after the spring show
As flowers fade, remove the spent bloom if seed production is not wanted. Keep green foliage attached until it yellows naturally; leaves replenish the bulb. Do not braid or tie leaves to make them less visible. Plan the bed with later perennials or a low seasonal planting that can conceal the leaves without cutting them.
Once leaves are dry, tidy the bed and update your map. If a clump needs division, lift it carefully after the foliage dies and replant firm bulbs promptly at their correct depth. Avoid dividing every year. Many bulbs prefer to remain undisturbed until crowding or declining display gives a reason to lift them.
For containers, keep the pot in a place where leaves can finish growing and maintain moisture according to active growth. Do not move a wet container into a warm indoor space to force flowers unless following a reliable species-specific forcing method. If you discard old bulbs, compost only healthy material and follow local guidance for diseased plant waste. Store any new bulbs in the conditions their supplier recommends.
Use your record from this year to decide what to change: add earlier or later varieties, move a group to a sunnier location, or correct drainage. Change one or two factors at a time so the result is interpretable. That makes the next spring bulb display easier to plan and more likely to suit the actual site.
Buy, label, and handle spring bulbs carefully
Order bulbs from a supplier that names the species or cultivar and gives clear planting instructions. Bulb size can affect the first season’s display, but size alone does not prove health or guarantee repeat flowering. Compare delivery timing with your local planting window so bulbs are not left in storage longer than necessary. If a seller substitutes a different variety, check the new plant’s depth, bloom time, and climate requirements before using the original plan.
Inspect bulbs when they arrive. Avoid those with extensive soft rot, mold, or damage, and keep healthy bulbs cool, dry, and ventilated until planting according to supplier directions. Do not store bulbs in a sealed damp bag or beside fruit. Keep different varieties in labeled paper bags or trays if they cannot be planted the same day. A record of the supplier, date, and variety helps when comparing performance later.
Handle bulbs gently and plant them promptly. Some species do not tolerate prolonged drying as well as others, so do not assume that every bulb can sit on a shelf for weeks. Follow the specific supplier guidance for storage. If a bulb is soft or visibly diseased, discard it away from the planting area rather than burying it among healthy stock.
Do not confuse ornamental bulbs with edible onions or garlic. Some spring-flowering bulbs are toxic if eaten, and plant material can be dangerous to pets or children. Store them separately from food crops, keep packages labeled, and wash hands after handling. If ingestion is suspected, contact an appropriate poison-control or veterinary professional with the plant identity; do not wait for symptoms or rely on a common-name guess.
When planting several kinds together, mark them clearly. Foliage can look similar before flowers appear, and a label makes it easier to care for plants according to the right species. Use labels that can remain outdoors, or maintain a map and photograph each package. This also prevents accidental digging when the bulbs are dormant and helps you reorder the varieties that performed well.
Update the map after flowering, while you can still match colors and bloom windows to each location. A quick note about soil moisture and shade will make next autumn’s decisions more precise than memory alone.